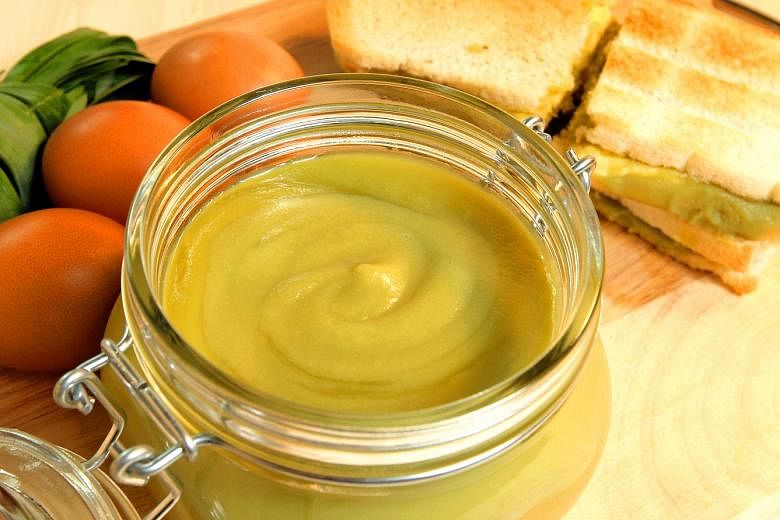

SINGAPORE (THE NEW PAPER) - It's a favourite for many since childhood, but while kaya has a simple ingredient list, making it is not child's play. All the stirring that is needed requires patience and some arm strength.
But put in that hard work and you should feel suitably entitled to gorge on this sinful coconut jam.
I'm not a usually a fan of kaya, but making it puts me in something of a frenzy. It's the challenge of making it that really got to me, or rather my ego.
When I announced that I was going to attempt making kaya, I got reactions ranging from begrudging respect to rolling eyeballs. But the more people told me to forget it, the more I had to do it. Just buy it from the supermarket, some scoffed. But of course, it's just not the same.
On one of my supermarket jaunts, I checked the contents on the labels of various commercial brands of kaya available. Some had emulsifiers, some contained starch, and yet another claimed no preservatives were used in its making, but the expiry date is next year.
This is the best reason you should make your own kaya. It's good to know exactly what goes into your recipe. Well, maybe. Knowing how much coconut milk, sugar and eggs it contains could make health-minded kaya lovers feel guilty.
In my case, I know there's additional amount of blood, sweat and tears in mine - almost literally. I sustained blisters on my fingers from all the whisking and stirring. I was given a basic recipe for making kaya from Mrs Grace Kua, 71, a retiree. From there, I experimented my way to achieving a kaya that most satisfies me.
Mrs Kua got her recipe from a nyonya friend in the 1970s.That original recipe called for 10 eggs, the undiluted coconut milk of one coconut and one kati (approximately 600g) of sugar. However, Mrs Kua found that combination resulted in a kaya that was too dry in texture, so she changed it to use eight medium-sized eggs and 400g of sugar, together with about four or five pandan leaves.
Mrs Kua says: "My sisters complained it was still too sweet, but when I reduced the sugar further, the kaya's texture became too dry."
This is because as the egg mixture heats up, the sugar melts and adds to the liquid content of the kaya. Less sugar means a drier texture.
When it comes to kaya, there are different versions. Some like it brown, while others like it green. To make brown kaya, caramelise part of the sugar before adding it to the egg mixture. This gives you a rich brown colour. Extract the pandan essence by crushing pandan leaves and squeezing them using a muslin cloth.
I combined both methods to get the caramel flavour and used more pandan essence to make my kaya a smooth milky green. And since it's almost the season to be jolly, you could even put your kaya into little jars and decorate them with ribbons. These little kaya pots make for unique and heartfelt gifts.
KAYA
INGREDIENTS
6 eggs (40g each)
400g sugar
500ml of coconut milk
4 Tbs pandan essence (made from grinding and squeezing 15 pandan leaves)
8 pandan leaves, washed and knotted into a bunch
Method
1. Crack the eggs into a bowl. In a mixing bowl, place the eggs and 300g of sugar. Whisk to dissolve the sugar.
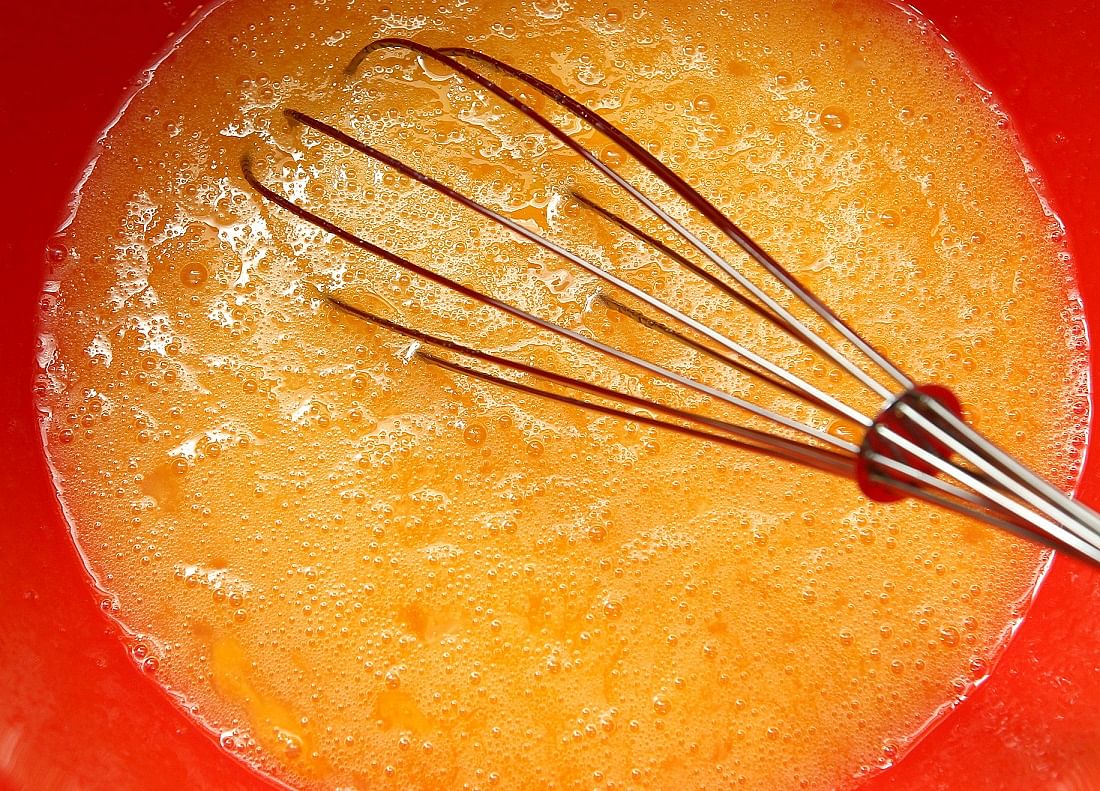
2. Add the coconut milk, whisking gently. Strain the egg mixture using a muslin cloth.

3. Transfer egg mixture into upper container of a double boiler.
4. Take 100g of sugar and place in a clean stainless steel pot. Over low heat, melt the sugar to caramelise it. Stir occasionally to prevent burning.
5. Place the double boiler containing the egg mixture over low heat.
6. Add the pandan essence and the pandan leaves.
7. Add the caramel to the egg mixture. The caramel will solidify, but continue whisking in one direction. It will melt as the mixture heats up.
8. Stir the mixture occasionally for the first 15 minutes. After that, stir constantly as the mixture thickens.It will take about 45 minutes to an hour from the time you begin heating the mixture to the point of completion.
9. Once the kaya reaches a thick consistency, remove from the double boiler and allow to cool. Discard the pandan leaves.
10. If you find it too lumpy, use a blender to make mixture smoother.Allow to cool completely before transferring into glass jars or air-tight plastic containers. It should keep for a week if refrigerated.
Yields two medium-sized jars.