Shooting the stars in New Zealand's Aoraki Mackenzie Dark Sky Reserve
SPH Brightcove Video
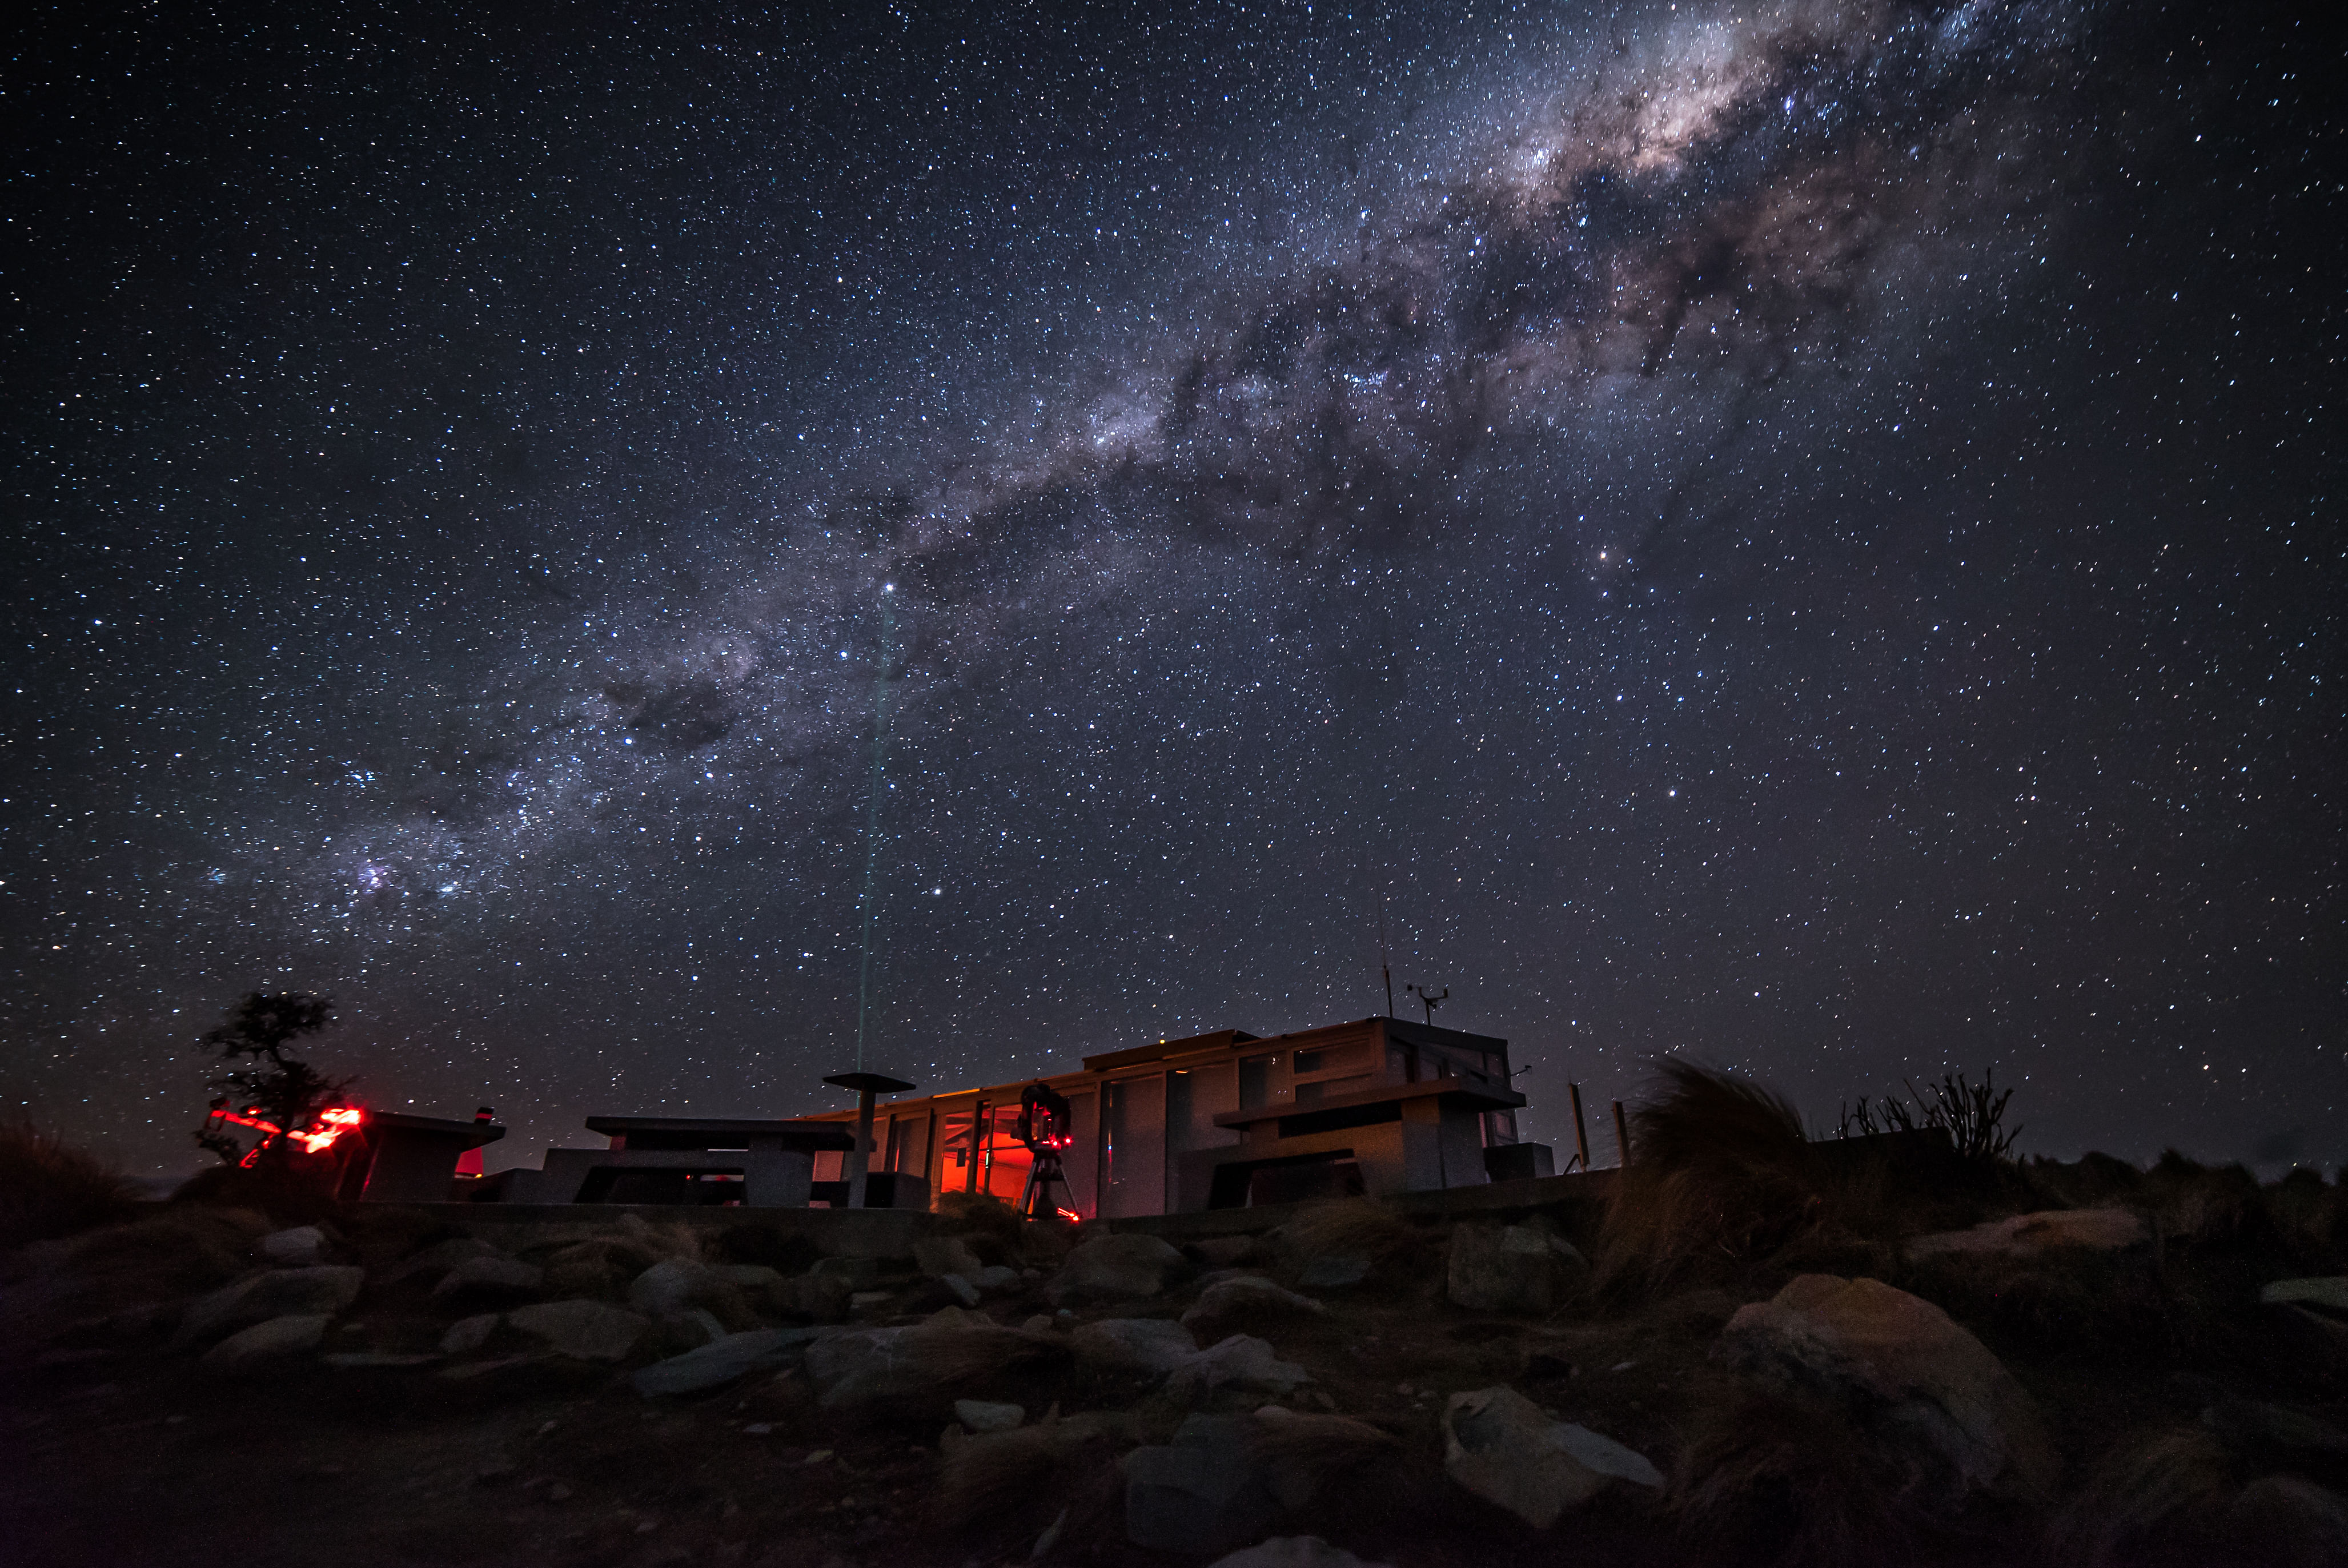
The best way to see starlight is to go dark.
Light pollution is a major hurdle when it comes to viewing the Milky Way. Only a few of the brightest stars sparkle in urbanised Singapore's sky. So when a group of friends and I decided to go on a stargazing trip, we picked a place that is home to one of the darkest skies in the world - New Zealand's Aoraki Mackenzie Dark Sky Reserve.
There are a number of dark sky preserves around the world, with Canada and the US being home to a majority of them. These areas are one of the few bastions left that are kept free from sources of artificial light like street lamps. The goal of a dark sky preserve is generally aimed at promoting astronomy.
Here is a guide on how to view the Milky Way in New Zealand and perhaps capture it on your camera. Trust me, you will want pictures to capture the experience. The immensity of our universe is both beautiful and extremely humbling.
WHEN IS THE MILKY WAY VISIBLE?
The galactic core of the Milky Way galaxy is visible from the months of February to October in the Southern hemisphere. During the mid-winter months of June and July, the core is at its brightest. This, coupled with the fact that days are shorter and nights are longer, will give you the optimum conditions to chase that perfect shot.
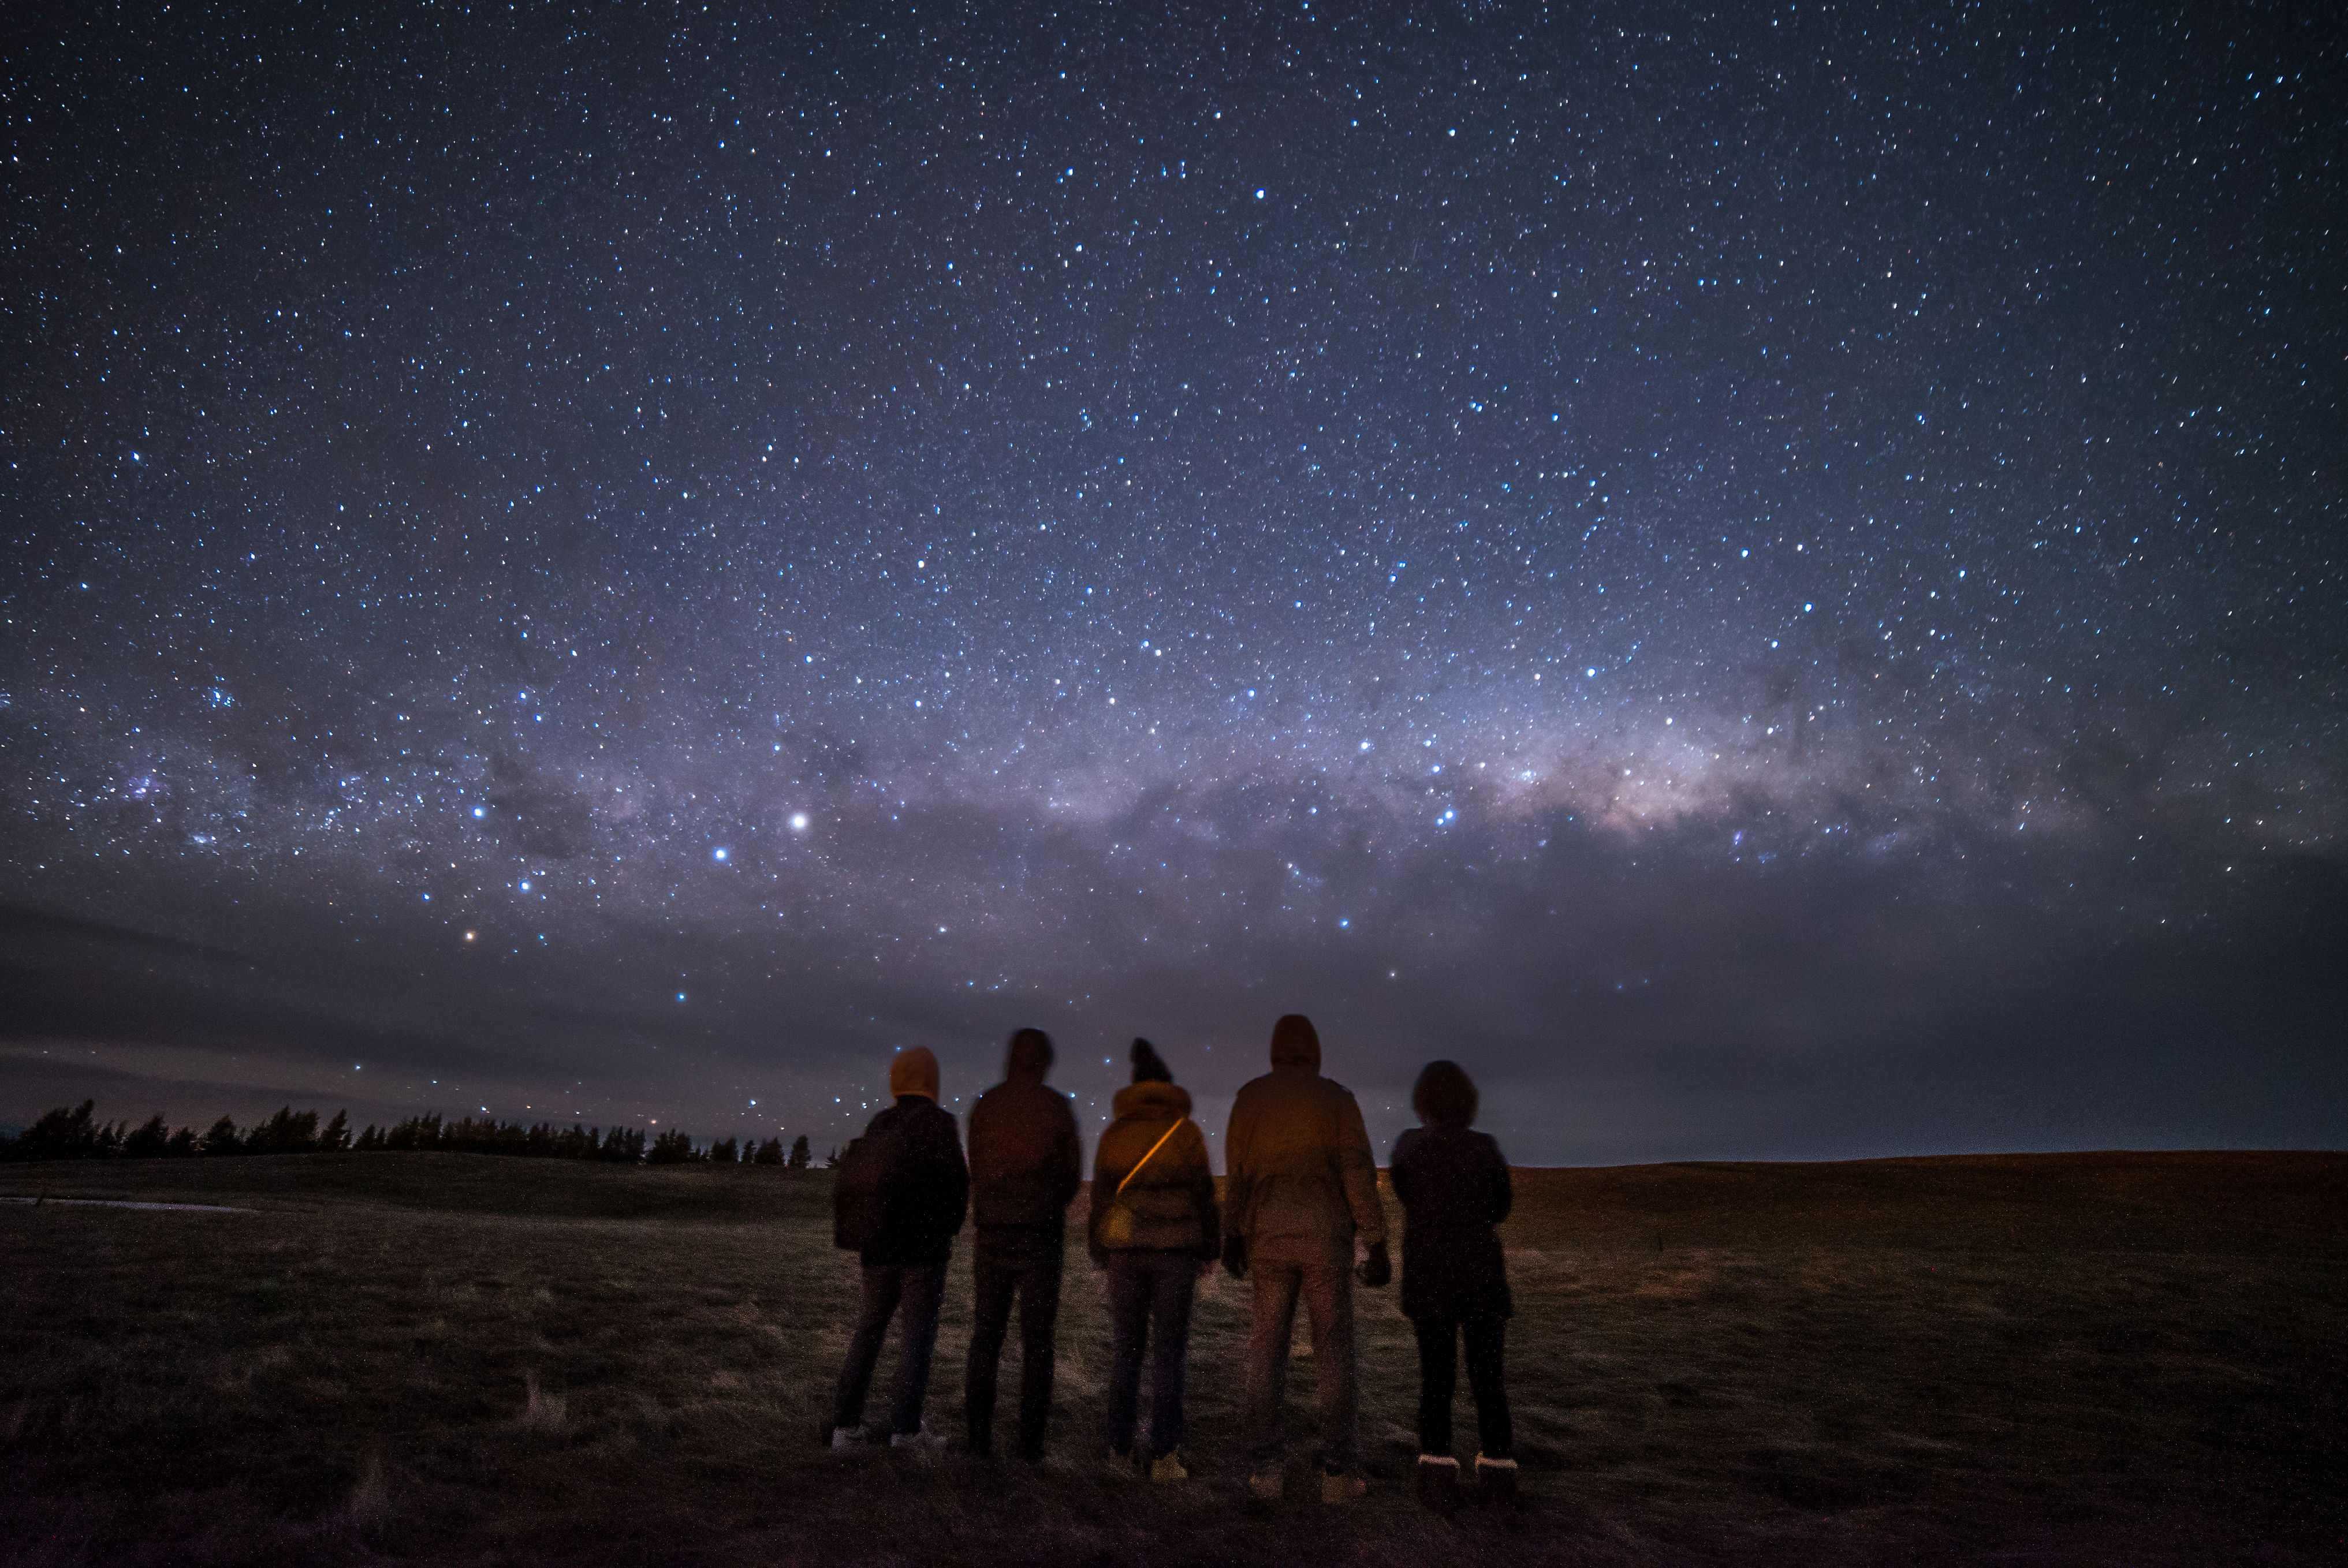
HOW DO YOU FIND THE MILKY WAY IN THE NIGHT SKY?
On clear nights, you should have no problems finding the Milky Way as it would appear as a huge cluster of stars stretching as far and wide as the eye can see.

There are also numerous mobile and desktop apps to choose from to help you plan your shot of the Milky Way.
My personal favourite is an app called Star Walk 2, which is available on both iOS ($3.98) and Android ($3.62).
The app zeroes in on your GPS location and charts out a map from your vantage point.
You basically point your phone like a camera at the sky and the app shows you what is in that direction. Then simply pan around until you find the Milky Way.
The app also has a function to alter the time, allowing you to see how the Milky Way's galactic core moves throughout the night.
Just look out for the Sagittarius constellation if you are unsure about finding the galactic core. Both celestial bodies are always right next to each other.
MOON PHASE
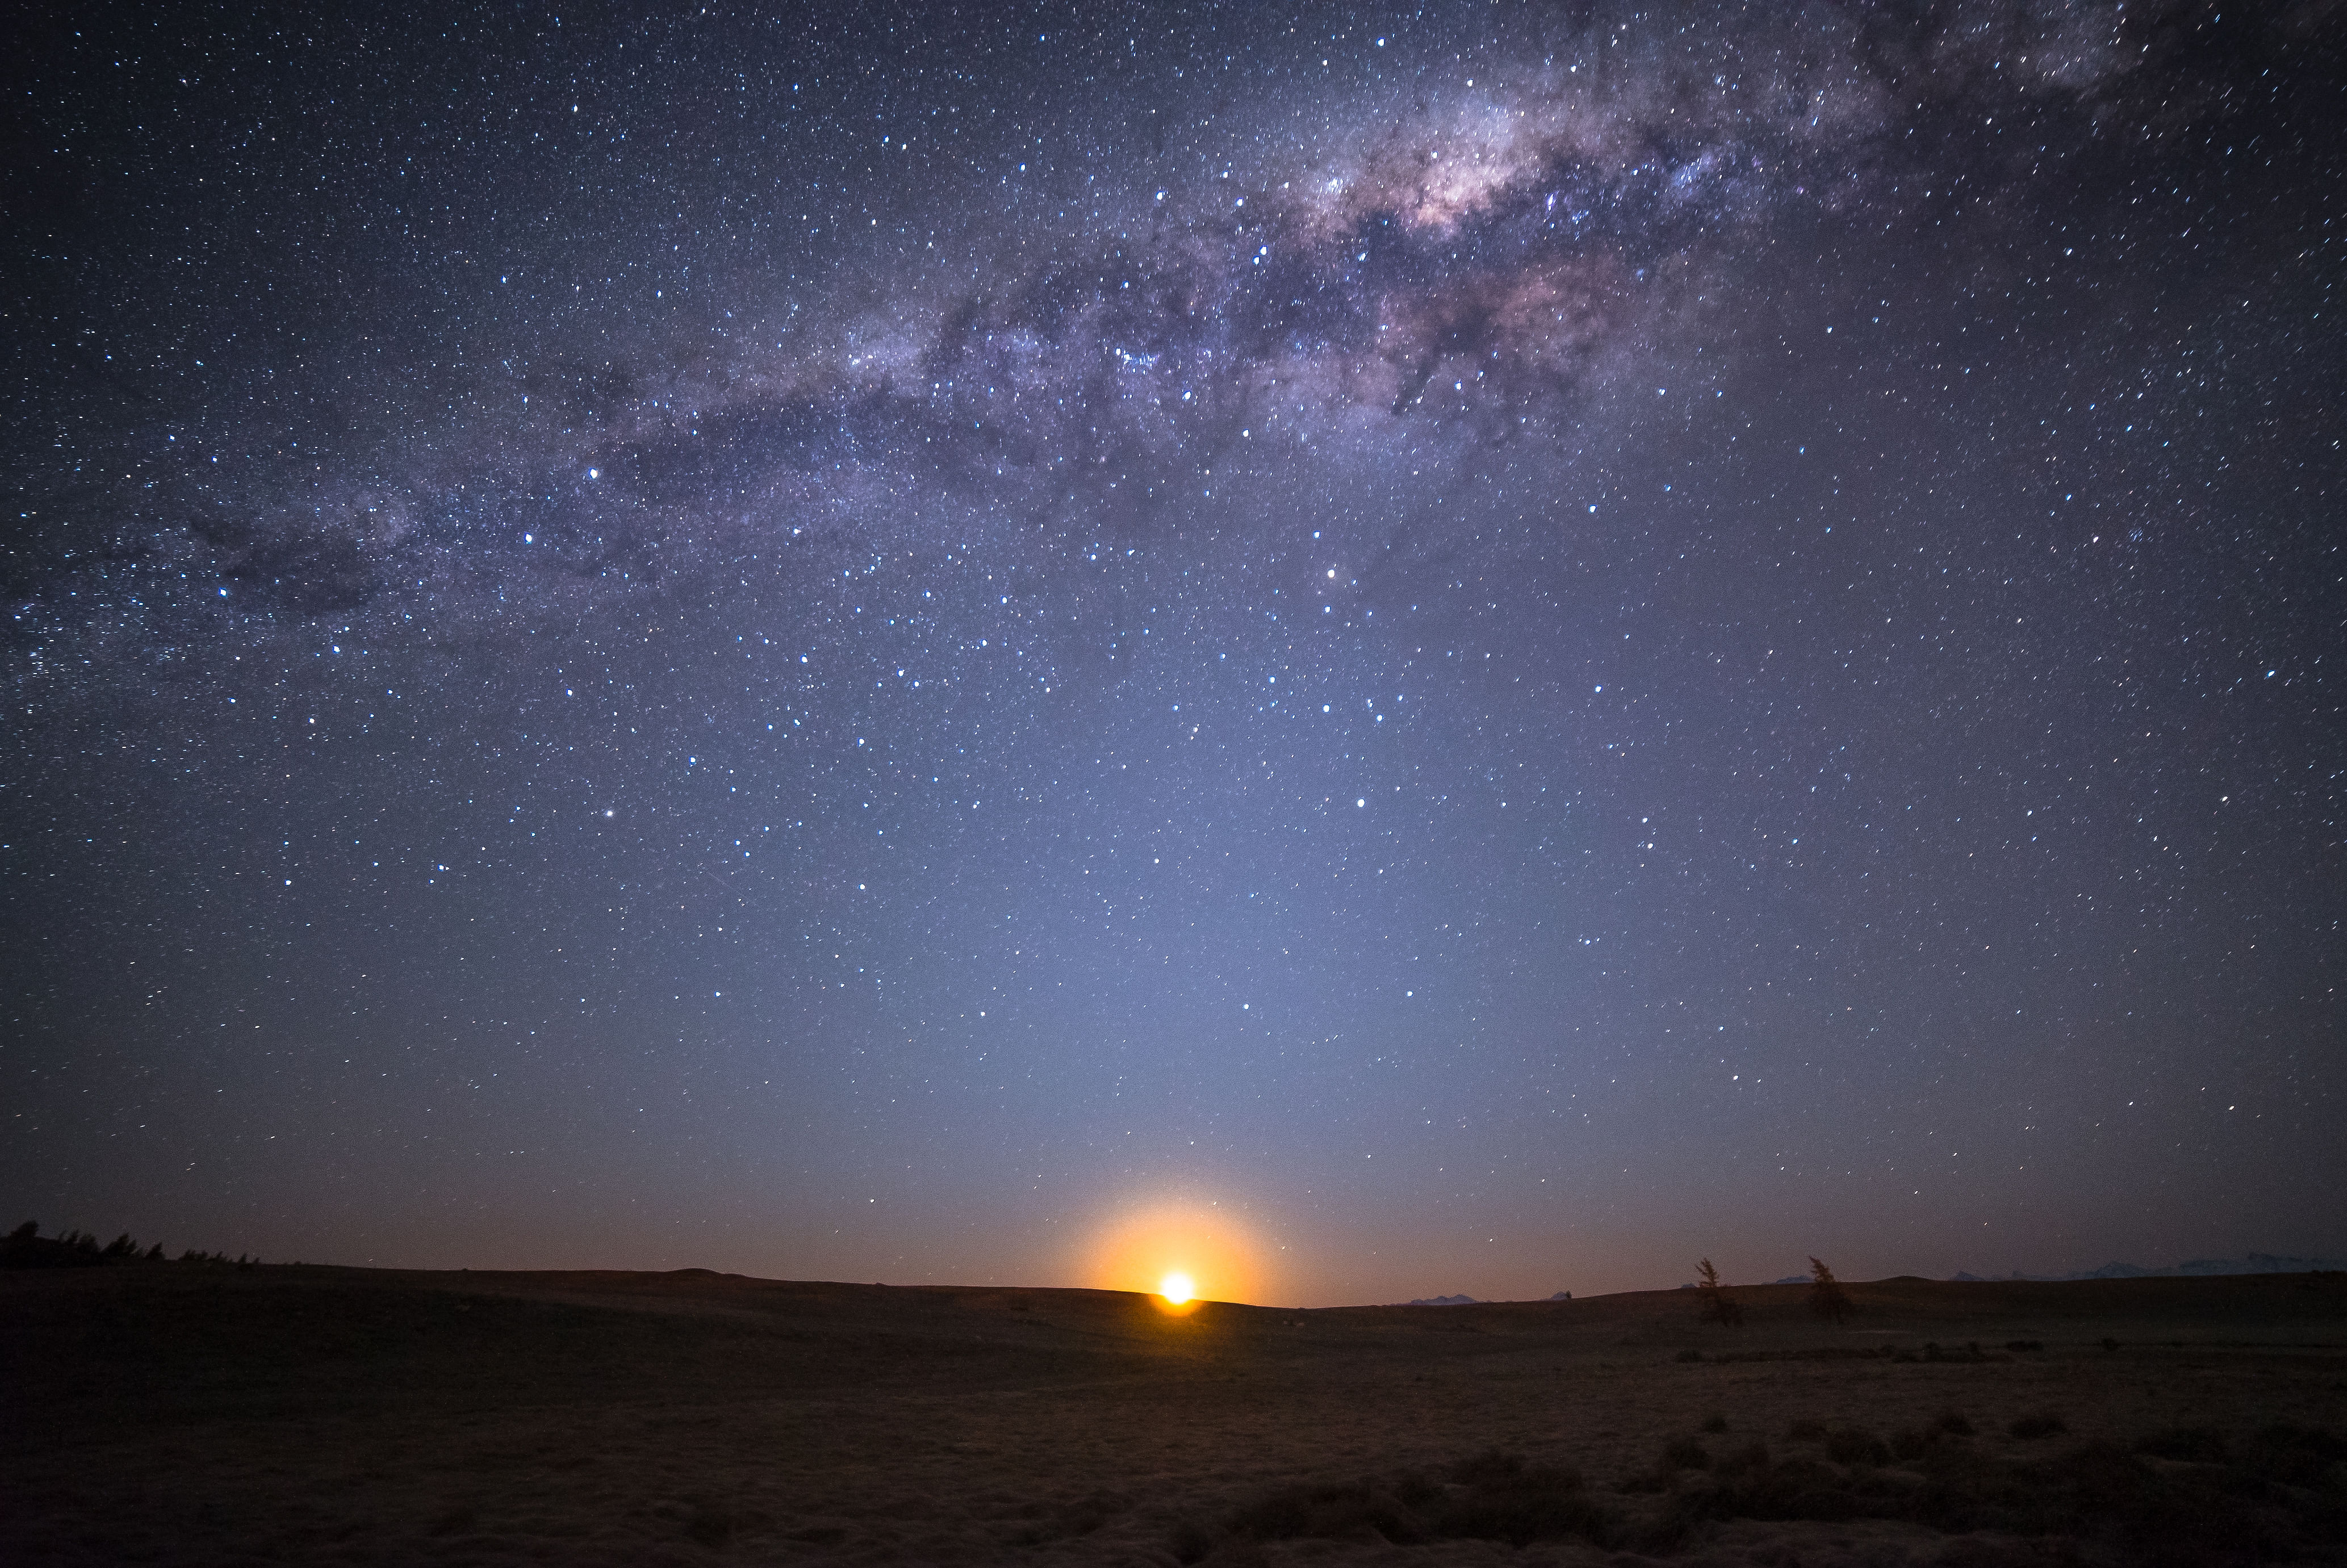
Shooting the Milky Way requires some of the darkest skies possible.
In a dark sky reserve, the moon alone will light up the entire night sky. So it is essential that you consider the moon phase to ensure that the moon does not ruin your shot.
I used this website to plan the dates for the trip around the new moon. This is when the moon is at its first phase and not visible in the night sky.
With little light from the new moon, the Milky Way's galactic centre will be at its brightest and most visible. As the moon approaches its full moon phase, getting a decent shot of the Milky Way will get much tougher.
The site also has an app for both iOS and Android in case you need to check the lunar cycle on the go.
BE PREPARED
Our trip was in August, towards the end of winter. It was a constant struggle against the cold, which went from a high of 12 deg C in the day to a low of -3 deg C at night.
If you are not accustomed to winter weather, I suggest bringing at least three layers of clothes to keep yourself warm. I would highly recommend four. Winter thermal wear, a thick jacket, a scarf and headwear are absolute necessities. The night time cold was exacerbated by windchill factors. A windproof jacket is also highly recommended, especially if you are shooting in the wilderness. Be prepared.
Another problem I encountered was that on colder nights when the temperatures hit below freezing point, my camera lens started fogging up, ruining my shots. An effective and cheap solution I found was to use rubber bands to hold hand warmers in place on my lens. Hand warmers can be found at most convenience stores during winter for about $2 a piece, they last for up to 10 hours depending on how cold it is.
CAMERA
A DSLR with full manual controls that can operate at high ISO settings is pivotal in capturing the Milky Way.
LENS
Due to the absence of light, a fast lens that can go to a maximum aperture of at least f/2.8 should be the bare minimum when shooting astrophotography.
Wide angle lenses are also ideal for framing the Milky Way in its entirety.
TRIPOD
Since you will be shooting at shutter speeds close to 30 seconds, a good sturdy tripod is essential.
Try not to skimp when getting a tripod. The last thing you would want is for your pictures to be ruined due to camera shake in windy conditions just so you could save a couple bucks.
HEADLAMP
Definitely get one of these. Most of your time would be spent fiddling in the dark getting your equipment ready and framing your shot, you will need to be able to see in the darkness. You can purchase one for between $20 and $30 on Amazon.
CAMERA SETTINGS
Set your camera to manual mode so you have full control of your shot.
A general rule would be to set your aperture to f/2.8, ISO to 6400 and shutter speed to 30 seconds. When setting your shutter speed, a point to note is that you must obey the 500-rule to avoid star trails. As the stars are moving through the sky, a long exposure shot may result in the stars appearing as a line instead of a point. Just remember that 500 divided by the focal length of your lens is equal to the longest exposure in seconds before your stars start to trail.
Your results may vary depending on how bright or dark your scene is. Tweak accordingly so you get the right exposure. The first thing to adjust to get your desired shot will be the ISO value.
I generally use a white balance of 3900k as I feel that gives the resulting shot the most natural look. Don't worry too much about white balance, you can change this value when you edit the photograph on your computer.
Focusing in complete darkness can be difficult. The trick is to use your camera's live view mode, and try to focus on the brightest star you can find. You will want to be on manual focus to achieve this. Keep adjusting your focus ring until the star is a sharp, pin-point of light.
I also shoot my images in RAW to give me maximum flexibility when I edit my photographs later.
POST PROCESSING

Editing Milky Way photographs vary from one individual to another. It really depends on what result you are going for. Some of my favourite astrophotographers like Michael Shainblum, Ian Norman and Mark Gee provide really insightful video tutorials on post processing their Milky Way images.
Good luck hunting for the Milky Way. I wish you clear skies ahead!
Watch the full video of my New Zealand trip here.
Join ST's Telegram channel and get the latest breaking news delivered to you.