
So I am one of those tedious people who need to nail a project perfectly on the first try. If at first I don't succeed, I move on.
Not for me the digging in of heels. Or perseverance. But circuit breaking does strange things to a person.
I decide, pretty much on a whim, to try my hand at making milk bread. I have stockpiled many tubes of cookie dough, made many banana cakes and many yeast-free loaves of bread, and it is time to tackle something more challenging.
So I do my research, poring over recipes and watching YouTube videos. I fully expect to turn out a perfect loaf the first time. But I fail. Four times. Using two recipes which had sounded workable.
When I complain bitterly to a friend, he texts back: "Who gets it right the first time?"
"Me. Usually."
At this point, I would have given up and moved on to something else. But I keep going because I have competition and zero social life.
My friend Pete in Britain turns out a perfect loaf on his second try.
I am apoplectic because here I am, using up precious bread flour and yeast to make...
"Scones?" my mother asks, her question a dagger to my heart.
Pete is the sweetest guy and is more than happy to share his tips for success. It turns out he uses a recipe I have seen many times. But I had refused to believe that King Arthur Flour, an American brand, can possibly have a good recipe for bread that uses tangzhong, a decidedly Asian concept.
But I use the recipe, following it to the letter, and turn out, to my complete surprise, perfectly fluffy pull-apart buns.
WHAT IS TANGZHONG?
Tangzhong and its Japanese counterpart yudane are versions of the same thing - a mix of flour and liquid to make a roux. Added to bread dough, the thickened, gelatinised flour not only makes the end result light and fluffy, but it also helps the bread stay fresh longer.
The roux does this by introducing more liquid to the bread dough without having it turn into a sodden mess. What sets them apart is the ratio of flour to liquid, and the method of making the roux.
Yudane uses equal amounts of flour and boiling liquid stirred together, while tangzhong uses one part flour to five parts liquid, cooked in a pan until the flour gelatinises, at 65 deg C.
Tangzhong added to bread dough caught fire some years ago after Taiwanese author Yvonne Chen wrote about it in Bread Doctor, a book I am trying desperately to find.
WHAT I DID WRONG
From what I have read online, I did several things wrong. The first was to overcook the tangzhong. If the idea is to introduce more liquid into the bread dough, then cooking the roux until it becomes a thick paste is self-defeating. Now, I aim for a pudding-like consistency to the roux. It continues to thicken off the heat.
I also did not knead the dough long enough the first four times. I had followed the recipes to the letter. But seven or eight minutes, or 15 minutes, are really not enough. This is no fault of the recipe authors - different kinds of bread flour from different countries behave differently. More on this later.
So now I knead the dough for at least 20 minutes, using the level 2 setting of my KitchenAid Artisan mixer. I would have given up long ago if I had to knead the sticky dough by hand.
The King Arthur Flour recipe has the perfect proportions for success. I have used the recipe on sunny and dry days, rainy and humid days, and the results have been pretty consistent. The levels of sweetness and saltiness are also just right.
UPPING THE ANTE
Once I start turning out plausible milk bread, I begin to think about gilding the lily. Some people call this sort of bread Hokkaido Milk Bread. What if I use milk from Hokkaido? What if I use bread flour from Japan? What if I use Japanese eggs?
So I march into Isetan and look at the bewildering bread flour options from the Tomiz brand. There are at least five versions, with varying prices. I go with the most princely - it costs $10.20 for 1kg. I find one brand of Hokkaido milk and I have Japanese eggs at home.
There are real differences among the types of bread flour I use. On a mad day, I make three batches of bread using three different brands of bread flour.
The Japanese one, Tomiz's Haruyutaka 100% Wheat, is from Hokkaido. It makes a beautiful dough that does not need very much kneading. Usually by the 12th minute, it is already pulling away from the sides of the bowl and forming a ball. I give it 20 minutes just to be safe.
Redman's bread flour ($2.50 for 1kg) needs 25 minutes of kneading plus two more minutes at level 4 at the end, and it never quite forms a ball. Bake King's bread flour ($3.35 for 1kg) balls up nicely after 20 minutes. I give it an extra two minutes at level 4 at the end too. I have not tried making milk bread with Prima's bread flour ($3.30 for 1kg), but plan to.
What accounts for the differences? I suspect it is the protein content of the flour.
Bread flour has a higher protein content than plain flour, allowing bread dough to develop gluten more easily. This sort of flour usually has between 12 and 14 per cent protein, compared with plain flour, which has 8 to 11 per cent protein. Only Redman states the protein content of its bread flour online - 12.8 to 13.8 per cent. So the protein content of the Japanese flour must be off the charts.
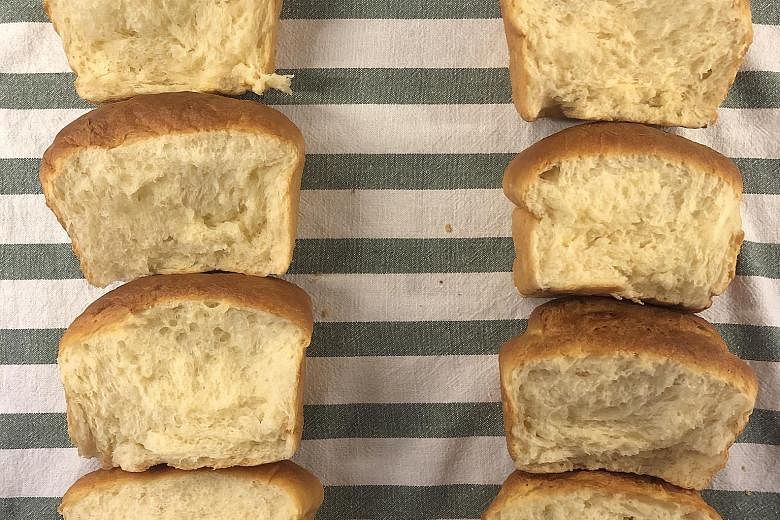
On another day, I decide to do a test among people whose palates I trust. I bake a loaf using the Japanese flour, milk and egg, and another using Bake King bread flour, Meiji milk from Thailand and a local egg.
The four testers are split down the middle. Two prefer the Bake King bread because they say the texture is more chewy, the taste more buttery. Two prefer the Japanese loaf for its fluffier texture, milkier taste and more complex flavour. I prefer the texture of the Japanese loaf, which is very clearly more fluffy than the other one, but on taste, I have to say I am torn.
The Japanese loaf tastes more delicate, but the other loaf has its charms because the butter seems to come through more distinctly. I use unsalted French butter for all versions of milk bread.
That exercise teaches me to gild the lily smartly. Why should I splurge on Japanese flour when a local brand yields a good loaf at a third of the price? But I will use Japanese milk because the taste is richer, the texture more creamy. If I have them in the fridge, I would use Japanese eggs too.
WHAT NEXT?
Giddy with delight at my success, I decide I would use the dough to make luncheon meat buns, like the shiny specimens in Asian bakeries.
I get out the good luncheon meat and get to work. Two batches later, I am in despair. My buns look like they are shaped by cave men - big, ungainly and ugly.
At the risk of being earnest, should I persevere? Would you?
• www.facebook.com/tanhsuehyun
• If you make milk bread, post photos of it on Instagram and tag @straitstimesfood and @msposhnosh
MILK BREAD
Adapted from www.KingArthurFlour.com
INGREDIENTS
FOR THE TANGZHONG
14g bread flour
43g water
43g whole milk
FOR THE DOUGH
298g bread flour
11g full cream milk powder
50g sugar
1 tsp salt
11g instant yeast
113g whole milk
1 egg
57g melted unsalted butter
2 tsp canola or grapeseed oil, or melted butter (for greasing)
2 tsp whole milk (for glazing)
METHOD
1. Make the tangzhong: Weigh out the ingredients in a small saucepan, starting with flour and ending with milk. Whisk thoroughly to remove lumps.
2.
Set the pan over medium-low heat and cook, whisking constantly. The minute you are able to draw lines on the bottom of the pan with the whisk, take the pan off the heat, continue whisking until smooth, then scrape the tangzhong into a bowl. It should have the consistency of pudding. Let it cool to room temperature before using.
3. Make the dough: Weigh the flour, milk powder, sugar and salt into the bowl of a mixer. Attach the dough hook to the machine. Whisk to combine. Pour in the instant yeast.
4. Combine the tangzhong, whole milk, egg and melted unsalted butter in a bowl. Whisk to combine. Pour these wet ingredients into the bowl.
5. Turn the machine on, setting the speed at medium low. I use level 2 on my KitchenAid Artisan mixer. Mix two to three minutes or until the wet and dry ingredients are incorporated. Stop the machine and use a silicone spatula to scrape down the sides and the bottom of the bowl, to make sure all the ingredients have been incorporated.
6. Turn the machine on again to level 2 and knead for five minutes. Stop the machine and, using a silicone spatula, scrape the dough off the hook and flip it over in the bowl. This is to make sure all parts of the dough are being kneaded. Knead another five minutes on level 2. Stop the machine, scrape the dough off the hook, flip it over and knead five more minutes. Repeat in five-minute increments until your dough is smooth. Depending on the flour you use, you might need to knead for 15 to 25 minutes. If in doubt, give it another five minutes. The dough will be sticky, but it will also be stretchy.
7. Oil a large mixing bowl and plop the dough into it, turning it over to grease the top. Cover with plastic wrap or a tea towel and let it rise for 60 minutes. At the end of the first rise, gently press the dough down to deflate it.
8. To make buns: Grease a 20cm round cake tin. Weigh the dough and divide it into eight portions.
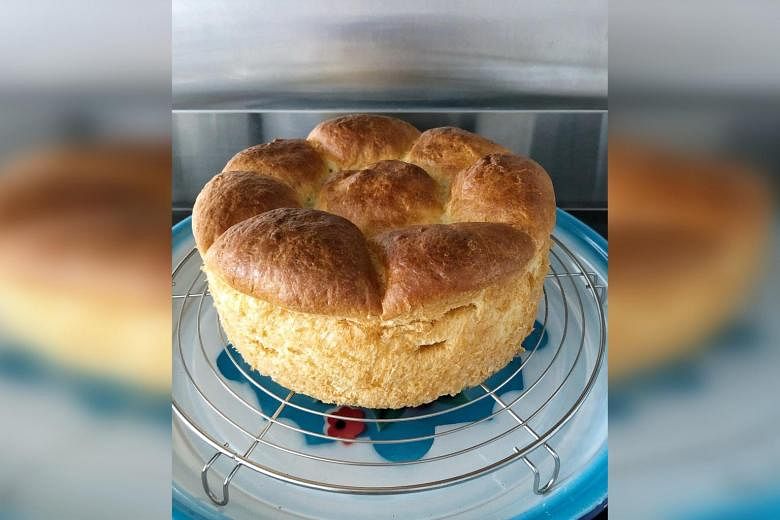
9. Take each portion of dough and spread it into a rough circle. Fold the edges into the middle and gather them to form a ball. Place the balls in the tin - one in the middle, surrounded by seven others. They will be snug. Cover with plastic wrap and let it rise a second time, for 45 minutes.
10. About 15 minutes before the 45 minutes are up, set an oven rack on the lowest or second lowest shelf. Pre-heat the oven to 180 deg C. When the 45 minutes are up, gently brush the dough with the milk and place the cake tin in the oven. Bake for 30 to 35 minutes or until golden brown. Remove from the oven and let the bread cool in the tin for five minutes. Slide a butter knife or offset spatula around the circumference of the pan to gently loosen the bread. Unmould carefully and let it cool completely on a metal rack before serving.
11.


To make a loaf: Grease a 22cm by 13cm loaf pan. Divide the dough into four equal portions. On a lightly floured work surface, using a rolling pin that has been floured, roll out one portion into an elongated oval that looks like naan bread. Fold the bottom towards the middle and fold the top over, like an envelope. Turn it 90 degrees and roll out into an elongated oval. Starting at the top, roll the dough as tightly as you can. Place it on one end of the loaf pan. Repeat with the second portion of dough, placing it at the other end of the pan. Repeat with the two other portions, and fill in the middle of the pan. Cover with plastic wrap and let rise 45 minutes. Repeat step 10. The baking time will be the same.
Tips for success
• I find the bread rises higher if I use overnight tangzhong. I make it the night before and scrape it into a small covered container. The next day, I take it out of the refrigerator at least an hour before using, to get it to room temperature. It is helpful to write the date on the container, in case you do not use it the day after. Discard after three days or if you spot specks of mould on the surface.
• It is tempting to knead the dough at a higher speed. I did that, until a reader pointed me to a website which cautioned against kneading at any level higher than low for longer than two minutes. I do not want my mixer to break down, so I keep the kneading level at 2 and knead the dough for a longer time.
• If in doubt about the smoothness of the dough, knead it for five minutes more. Sometimes, I let it knead at level 4 for two minutes at the end. The dough should be able to stretch so that it is translucent.
• As much satisfaction as it gives me to punch the dough down after the first rise, this is a delicate bread and I deflate it gently by pressing down with my palm.
• Use a cake tin with tall sides. You want the dough to rise high in it.
• I like a simple milk glaze, but you can also use an egg beaten with 1 Tbs of water or milk. If you want more of a sheen, brush the bread with melted or softened butter after it comes out of the oven, before unmoulding.
• If you want to be serious about baking, you will need a digital scale with a "tare" function that resets the scale to zero, allowing you to weigh multiple ingredients one after another in a bowl.
• I have tried making the bread with lactose-free milk, sans milk powder. The end result is more dense than milk bread made with whole milk. Whipping cream for the dough (not the tangzhong) also results in a dense loaf. I refuse to consider low-fat and non-fat milk. Please just go with whole milk.